中文
ENGLISH
中文
ENGLISH
Nowadays, a four-axis rotary table is a common piece of equipment in the machine shop. the programming coordinates must be synchronized with the coordinates of the rotary table. In this article, we will share a method to determine the rotation center of a 4-axis rotary table.
Here, we show a 4-axis rotary table that rotates around the X-axis of a machine tool, where the axis of rotation is called the A-axis. In a word, all we need to do is to determine the Y/Z coordinates of the center of rotation on the 4-axis machine.
In addition, the X coordinate values are determined by the placement of the product, so we won’t go into detail here. The following are the specific steps to determine the center of rotation.
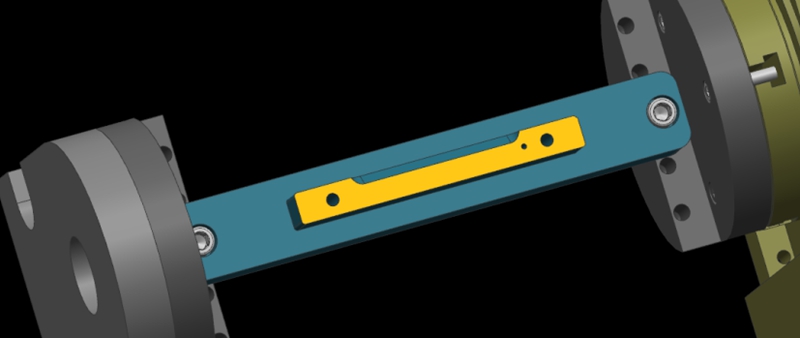
Firstly, use the calibration table to calibrate the fixture datum plane (the yellow surface). Then, set the calibrated datum plane to the 0 degree position of the A-axis.
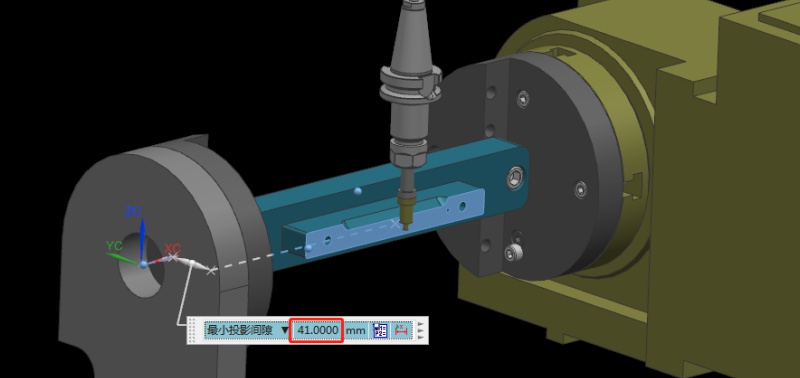
After setting the datum plane, we need to rotate the A-axis 90 degrees positive. Then, use a centering bar to measure the machine position where the datum plane is located. In the relative coordinate setting, set the Y coordinate to “0”.
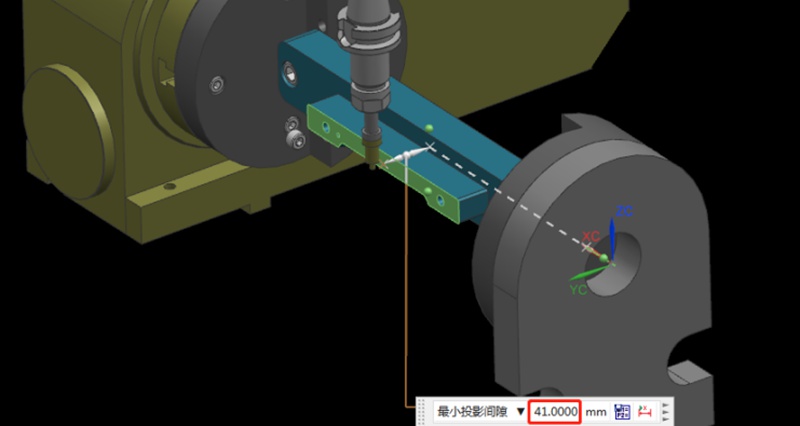
Next, rotate the A-axis 180 degrees in the negative direction. Same as the last step, we need to measure the machine position on the other side of the datum using the centering bar. Then, check the current relative Y value of the machine. For example, if we assume the Y value is “92mm”, the centering diameter is 10mm centering diameter, and the fixture datum to the rotary table is 41mm.
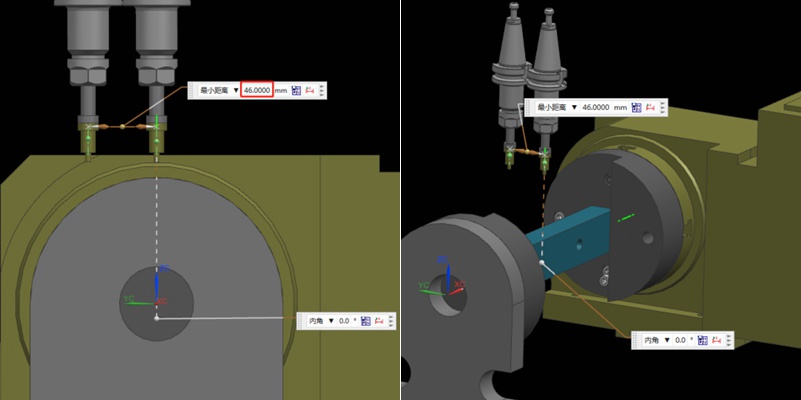
Referring to the values in the previous step, we can calculate that 92/2 = 46mm, so half of the Y value of 46mm. Then, we move the centering bar 46mm negatively towards the Y-axis.
As shown by the picture, the centering bar is now just aligned with the rotational axis of the rotary table. At the time, the position of the alignment point is the zero point of the Y value of the machine. In this way, we have completed half of the operation work.
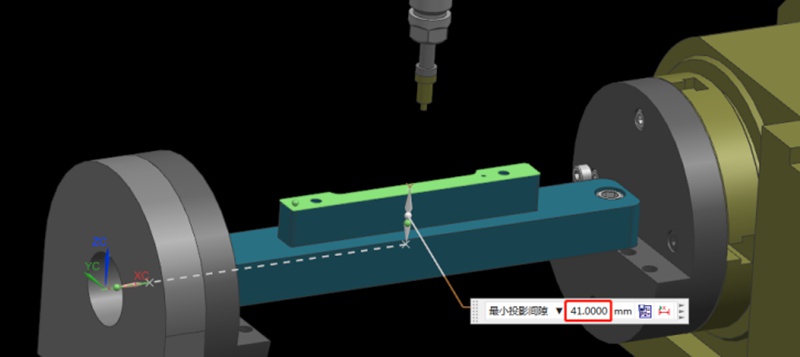
Finding the Z value is relatively simple. After the rotary table returns to the A0 position, the zero point of the Z-axis of the rotary axis can be determined by moving down 41mm with the datum surface as the calculation base. This value is calculated using the formula “(92-10)/2”, where 92 is the Y-value found earlier and 10 is the diameter of the centering bar. By applying this formula, the Z value is determined.
Finally, the intersection of the Z and Y axis is the rotation center around the X axis. With these steps, we can determine the rotation center of the 4-axis rotary table.
After determining the center value, in the programming software, we need to synchronize the program coordinates with the rotation axis of the 4-axis rotary table (relative distance of the coordinates to the fixture datum). Then we can output the program for all machined surfaces. So, the vowin.cn/en/News/news1251.html' target='_blank'>machining of multiple faces of a part can be completed by one coordinate.
By determining the rotation center of the 4-axis rotary table, we can complete the machining of multiple surfaces or four-axis simultaneous machining in a single clamping process with one coordinate. It also avoids the trouble of setting the machining coordinates for each machined surface during multi-face machining. In this way, we can ensure relative accuracy between the machined surfaces.


